preFIX version 1.2 released

preFIX – getting those alignments done

The 1.2 update introduces VST3 support and fixes an issue in the phase section (flipped 90/180 degree settings). The update also provides online documentation.

The update is available for Windows in VST and VST3 format as freeware. Download your copy here.

artificial reverberation: from mono to true stereo

“True stereo” is a term used in audio processing to describe a stereo recording, processing or playback technique that accurately represents the spatial location of sound sources in the stereo field. In true stereo, the left and right channels of a stereo recording contain distinct and separate audio information that accurately reflects the spatial location of sound sources in the recording environment.

This is in contrast to fake/pseudo stereo, where the stereo image is created through artificial means, such as by applying phase shifting techniques to create the impression of stereo. True stereo is generally considered to be superior to fake stereo, as it provides a more natural and immersive listening experience, allowing the listener to better locate and identify sound sources within the stereo field. In the domain of acoustic reverberation, this is essential for the perception of envelopment.

Artificial reverberation has come a long way since its early beginnings. The first mechanical devices for generating artificial reverberation, such as spring or plate reverberation, were initially only available as mono devices. Even when two-channel variants emerged, they usually did summing to mono internally or did processing in separate signal paths, known as dual mono processing. Typically, in a plate reverb, a two-channel output signal was achieved simply by mounting two transducers on the very same reverb plate.

The first digital implementations of artificial reverberation did not differ much from the mechanical ones regarding this principle. Quite common was summing the inputs to mono and the independent tap of two signals from a single reverb tank to obtain a two-channel output. Then, explicit early reflection models were added, which were typically processed for left and right separately and merged into the outputs later to preserve a basic representation of spatial information. Sometimes, also the first reflections were just taken from a (summed) mono signal. The Ursa Major 8×32 from 1981 is a good example for this design pattern. Later, the designs became more sophisticated, and even today it is common to distinguish between early and late reverberation in order to create a convincing impression of immersion.

However, ensuring proper sound localisation through early reflection models is a delicate matter. First and foremost, a real room does not have a single reflection pattern, but a vast variety of ones that depend on the actual location of the sound source and the listening position in that room. A true-to-life representation of this would, therefore, have to be represented by a whole set of individual reflection patterns per sound source and listening position in the virtual room. As far as I know, the VSL MIR solution is the only one that currently takes advantage of this, and with an enormous technical effort.

Another problem is that first reflections can also be detrimental to the sound experience. Depending on their frequency and delay in relation to the direct signal, the direct signal can be masked and affected in terms of phase coherence so that the overall sound becomes muddy and lacks clarity. This is one of the reasons why a real plate reverb is loved so much for its clarity and immediacy: it simply has no initial reflections in this range. As a side note, in the epicPLATE implementation, this behaviour is accurately modeled by utilizing a reverberation technique that completely avoids reflections (delays).

Last but not least, in a real room there is no clear separation between the first reflections and the late reverberation. It is all part of the same reverberation that gradually develops over time, starting with just an auditory event. This also means that there is no clear distinction between events that can be located in space and those that can no longer be identified – this also continuously evolves over time.

A good example of how to realise digital reverb without this kind of separation between early and late reverberation and at the same time in “true stereo” was impressively demonstrated by the Quantec QRS back in the early 80s already. Its ability to accurately reproduce stereo was one of the reasons why it became an all-time favourite not only in the music production scene, but also in post-production and broadcasting.

Artificial reverberation is full of subtleties and details and one might wonder why we can perceive them at all. In the end, it comes down to the fact that in the course of evolution there was a need for such fine-tuning of our sensory system. It was a matter of survival and important for all animal species to immediately recognise at all times: What is it and where is it? The entire sensory system is designed for this and even combines the different sensory channels to always answer these two questions. Fun Fact: This is exactly why some visual cues can have a significant impact on what is heard and why blind tests (in both meanings) are so important for assessing certain audio qualities. See also the “McGurk Effect” if you are interested.

Have fun listening!

the world of sound localization according to psychoacoustics

Sound localization refers to the ability of the human auditory system to determine the location of a sound source in space. This is done by analyzing the differences in the arrival time, intensity, and spectral content of the sound waves that reach the two ears. The human ear is able to localize sounds both horizontally (azimuth) and vertically (elevation) in the auditory space.

The brain processes the incoming sound signals from both ears to calculate the interaural time difference (ITD) and interaural level difference (ILD), which are used to determine the location of the sound source. Interaural time difference refers to the difference in the time it takes for a sound wave to reach each ear, while interaural level difference refers to the difference in the level of the sound wave that reaches each ear.

The auditory system uses both ITD and ILD as complementary cues that work together to allow for accurate sound localization in the horizontal plane, aka stereo field. For example, sounds coming from straight ahead might have similar ITDs at both ears but different ILDs, while sounds coming from the side might have similar ILDs at both ears but different ITDs.

It’s also worth noting that the relative importance of ITD and ILD can vary depending on the frequency of the sound. At low frequencies, ITD is the dominant cue for sound localization, while at high frequencies, ILD becomes more important. Research has suggested that the crossover frequency between ILD and ITD cues for human sound localization is around 1.5 kHz to 2.5 kHz, with ITD cues being more useful below this frequency range and ILD cues being more useful above this range.

In addition to ITD and ILD, the auditory system also uses spectral cues, such as the shape of the outer ear and the filtering effects of the head and torso, to determine the location of sounds in the vertical plane and also to identify backside audio events.

The temporal characteristics of an audio event, such as its onset and duration, can have an impact on sound localization as well. Generally speaking, sounds with a more distinct onset, such as a drum hit, are easier to localize than sounds with a more sustained signal, such as white noise. This is because the onset of a sound provides a more salient cue for the auditory system to use in determining the location of the sound source, especially in regards to ITD.

In the case of a drum hit, the sharp onset creates a more pronounced difference in the arrival time and intensity of the sound at the two ears, which makes it easier for the auditory system to use ITD and ILD cues to locate the sound source. In contrast, with a more sustained signal like white noise, the auditory system may have to rely more on spectral cues and reverberation in the environment to determine the location of the sound source.

what is a “box tone”?

“Box tone” is a term that is often used to describe the characteristic sound of a particular piece of audio equipment, particularly when it comes to classic analog effects devices such as equalizers and compressors.

The box tone of an effect is often described as the unique timbre or tonal coloration that the device imparts on the audio signal as it passes through it. This can be due to a variety of factors, including the type and quality of the components used in the device, the design of the circuitry, and the way the device processes the signal.

Some audio engineers and producers may seek out specific box tones for their recordings and mixes, as they can add character and depth to the sound. Others may prefer a more neutral or transparent sound, in which case they may choose equipment that has a more subtle or less noticeable box tone.

It’s important to note that the term “box tone” is often used informally and can be somewhat subjective, as different people may have different opinions on what constitutes a distinctive or desirable box tone.

how I listen to audio today

Developing audio effect plugins involves quite a lot of testing. While this appears to be an easy task as long as its all about measurable criteria, it gets way more tricky beyond that. Then there is no way around (extensive) listening tests which must be structured and follow some systematic approach to avoid ending up in fluffy “wine tasting” categories.

I’ve spend quite some time with such listening tests over the years and some of the insights and principles are distilled in this brief article. They are not only useful for checking mix qualities or judging device capabilities in general but also give some  essential hints about developing our hearing.

No matter what specific audio assessment task one is up to, its always about judging the dynamic response of the audio (dynamics) vs its distribution across the frequency spectrum in particular (tonality). Both dimensions can be tested best by utilizing transient rich program material like mixes containing several acoustic instruments – e.g. guitars, percussion and so on – but which has sustaining elements and room information as well.

Drums are also a good starting point but they do not offer enough variety to cover both aspects we are talking about and to spot modulation artifacts (IMD) easily, just as an example. A rough but decent mix should do the job. On my very own, I do prefer raw mixes which are not yet processed that much to minimize the influence of flaws already burned into the audio content but more on that later.

Having such content in place allows to focus the hearing and to hear along a) the instrument transients – instrument by instrument – and b) the changes and impact within particular frequency ranges. Lets have a look into both aspects in more detail.

a) The transient information is crucial for our hearing because it is used not only to identify intruments but also to perform stereo localization. They basically impact how we can separate between different sources and how they are positioned in the stereo field. So lets say if something “lacks definition” it might be just caused by not having enough transient information available and not necessarily about flaws in equalizing. Transients tend to mask other audio events for a very short period of time and when a transient decays and the signal sustains, it unveils its pitch information to our hearing.

b) For the sustaining signal phases it is more relevant to focus on frequency ranges since our hearing is organized in bands of the entire spectrum and is not able to distinguish different affairs within the very same band. For most comparision tasks its already sufficient to consciously distinguish between the low, low-mid, high-mid and high frequency ranges and only drilling down further if necessary, e.g. to identify specific resonances. Assigning specific attributes to according ranges is the key to improve our conscious hearing abilities. As an example, one might spot something “boxy sounding” just reflecting in the mid frequency range at first sight. But focusing on the very low frequency range might also expose effects contributing to the overall impression of “boxyness”. This reveals further and previously unseen strategies to properly manage such kinds of effects.

Overall, I can not recommend highly enough to educate the hearing in both dimensions to enable a more detailed listening experience and to get more confident in assessing certain audio qualities. Most kinds of compression/distortion/saturation effects are presenting a good learning challenge since they can impact both audio dimensions very deeply. On the other hand, using already mixed material to assess the qualities of e.g. a new audio device turns out to be a very delicate matter.

Lets say an additional HF boost applied now sounds unpleasant and harsh: Is this the flaw of the added effect or was it already there but now just pulled out of that mix? During all the listening tests I’ve did so far, a lot of tainted mixes unveiled such flaws not visible at first sight. In case of the given example you might find root causes like too much mid frequency distortion (coming from compression IMD or saturation artifacts) mirroring in the HF or just inferior de-essing attempts. The most recent trend to grind each and every frequency resonance is also prone to unwanted side-effects but that’s another story.

Further psychoacoustic related hearing effects needs to be taken into account when we perform A/B testing. While comparing content at equal loudness is a well known subject (nonetheless ignored by lots of reviewers out there) it is also crucial to switch forth and back sources instantaneously and not with a break. This is due to the fact that our hearing system is not able to memorize a full audio profile much longer than a second. Then there is the “confirmation bias” effect which basically is all about that we always tend to be biased concerning the test result: Just having that button pressed or knowing the brand name has already to be seen as an influence in this regard. The only solution for this is utilizing blind testing.

Most of the time I listen through nearfield speakers and rarely by cans. I’m sticking to my speakers since more than 15 years now and it was very important for me to get used to them over time. Before that I’ve “upgraded” speakers several times unnecessarily. Having said that, using a coaxial speaker design is key for nearfield listening environments. After ditching digital room correction here in my studio the signal path is now fully analog right after the converter. The converter itself is high-end but today I think proper room acoustics right from the start would have been a better investment.

audio analyzers currently in use here

During tracking, mixing and mixdown I’m utilizing different analyzers whether thats freeware or commercial, hard- or software. Each of them doing a decent job in its very own area:

VU Meter

Always in good use during tracking and mixing mainly for checking channel levels and gainstaging all kinds of plugins. I also love to have a VU right on the mixbus to get a quick visual indication about Peak vs RMS dynamic behaviour.

TBProAudio mvMeter2 is freeware and actually meters not only VU but also RMS, EBU LU as well as PPM. It is also resizeable (VST3 version) and supports different skins.

Spectrum Analyzer I

To me, the Voxengo SPAN is an all-time classic analyzer and ever so reliable. I’ve always used it to have a quick indication about an instruments frequency coverage or the overall frequency balance on the mixbus. There is always one running at the very end of the summing bus in the post-fader section.

Voxengo SPAN is also freeware and highly customizable regarding the analyzer FFT resolution, slope smoothing and ballistics.

Spectrum Analyzer II

Another spectrum analyzer I’m using is Voxengo TEOTE which actually is not only an analyzer but a full spectrum dynamic processor. However, let alone the analyzer itself (fully working in demo mode!) is an excellent assistant when it comes to assess the overall frequency balance. The analyzer does this in regards to a full spectrum noise profile which is adjustable with a Tilt EQ, basically. Very handy for judging deviations (over time) from an ideal frequency response.

Voxengo TEOTE demo version available on their website.

Loudness Metering

I’m leaving all EBU R128 related business to the TC Electronic Clarity M. Since it is a hardware based monitoring solution it always is active here on my desktop no matter what and also serves for double-checking equal RMS levels (for A/B comparisions) and a quick look at the frequency balance from time to time. The hardware is connected via USB (could be SPDIF as well) and is driven by a small remote plugin sitting at the very end of the summing bus in my setup here. It also offers a vector scope and provides audio correlation information. It supports a vast variety of professional metering standards.

Courtesy of Music Tribe IP Ltd.

Image Courtesy of Music Tribe IP Ltd.


What loudspeakers and audio transformers do have in common

Or: WTF is “group delay”?

Imagine a group of people visiting an exhibition having a guided tour. One might expect that the group reaches the exhibitions exit as a whole but in reality there might be a part of that group just lagging behind a little bit actually (e.g. just taking their time).

Speaking in terms of frequency response within audio systems now, this sort of delay is refered to as “group delay”, measured in seconds. And if parts of the frequency range do not reach a listeners ear within the very same time this group delay is being refered to as not being constant anymore.

A flat frequency response does not tell anything about this phenomena and group delay must always be measured separately. Just for reference, delays above 1-4ms (depending on the actual frequency) can actually be perceived by human hearing.

This always turned out to be a real issue in loudspeaker design in general because certain audio events can not perceived as a single event in time anymore but are spread across a certain window of time. The root cause for this anomaly typically lies in electrical components like frequency splitters, amplifiers or filter circuits in general but also physical loudspeaker construction patterns like bass reflex ports or transmission line designs.

Especially the latter ones actually do change the group delay for the lower frequency department very prominently which can be seen as a design flaw but on the other hand lots of hifi enthusiast actually do like this low end behaviour which is able to deliver a very round and full bass experience even within a quite small speaker design. In such cases, one can measure more than 20ms group delay within the frequency content below 100Hz and I’ve seen plots from real designs featuring 70ms at 40Hz which is huge.

Such speaker designs should be avoided in mixing or mastering situation where precision and accuracy is required. It’s also one of the reasons why we can still find single driver speaker designs as primary or additional monitoring options in the studios around the world. They have a constant group delay by design and do not mess around with some frequency parts while just leaving some others intact.

As mentioned before, also several analog circuit designs are able to distort the constant group delay and we can see very typical low end group delay shifts within audio transformer coupled circuit designs. Interestingly, even mastering engineers are utilizing such devices – whether to be found in a compressor, EQ or tape machine – in their analog mastering chain.

The renaissance of the Baxandall EQs

Already in 1950, Peter Baxandall designed an analog tone correction circuit which found its way into some million consumer audio devices later on. Today, it is simply referred to as a Baxandall EQ.

What the f*ck is a Baxandall EQ?

Beside its appearance in numerous guitar amplifiers and effects, it made a very prominent reincarnation in the pro audio gear world in 2010 with the Dangerous Music Bax EQ. The concept shines with its very broad curves and gentle slopes which are all about transparancy and so it came to no surprise that this made it into lots of mastering rigs right away.

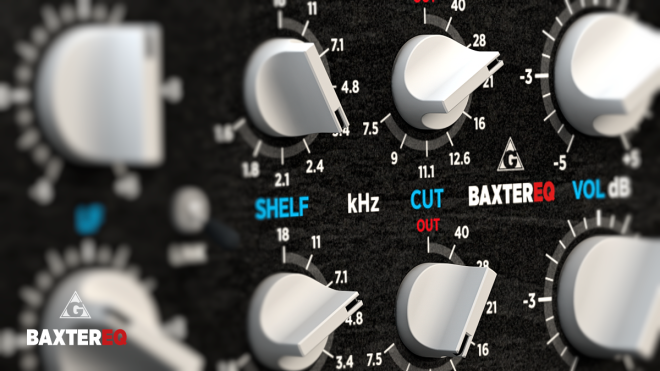
And it also had a reason that already in 2011 I did an authentic 1:1 emulation of the very same curves within the Baxter EQ plugin but just adding a dual channel M/S layout to better fit the mastering duties. For maximum accuracy and transparancy it already featured oversampling and double-precision filter calculations to that time and it is still one of my personal all time favourite EQs.

BaxterEQ

During the last 10 years quite a number of devices emerged each showing its very own interpretation of the Baxandall EQ whether thats in hard or software and this was highly anticipated especially in the mastering domain.

A highly deserved revival aka renaissance.

When comparing units be aware that the frequency labeling is not standardized and different frequencies might be declared while giving you same/similar curves. More plots and infos can be found here (german language).

A more realistic look at the Pultec style equalizer designs

One of the few historic audio devices with almost mystical status is the Pultec EQP-1A EQ and a lot of replicas has been made available across the decades. Whether being replicated in soft- or hardware, what can we expect from a more realistic point of view? Lets have a closer look.

Some fancy curves from the original EQP-1A manual
  • In the top most frequency range a shelving filter with 3 pre selected frequencies is offered but just for attenuation. Much more common and usable for todays mixing and mastering duties would be an air band shelving boost option here.
  • Also in the HF department there is just one single peak filter but this time just for boosting. It offers 7 pre selected frequencies between 3 and 16kHz and only here the bandwidth can be adjusted. However, the actual curves could have been steeper for todays mixing duties.
  • There is no option in the mid or low-mid range at all and also no high pass option. Instead, there is a shelving filter for the low-end which allows for boost and/or attenuation around four pre selected frequencies between 20 and 100 Hz.

All in all, this appears to be a rather quirky EQ concept with quite some limitations. On top of that, the low frequency behaviour of the boost and cut filters is rather unpredictable if both filters are engaged simultaneously which is exactly the reason why the original manual basically states “Do not attempt to do this!”.

Nowadays being refered to as the “Pultec Bass Trick” the idea is that you not only boost in some low end area but also create some sort of frequency dip sligthly above to avoid too much of a boost and muddiness in total. In practise, this appears to be rather unpredictable. Dial in a boost at 3 and an attenuation at 5, just as an example: Does this already feature a frequency dip? And if so at which frequency exactly? One has no idea and it even gets worse.

Due to aged electronics or component variety one has to expect that the actual curve behaviour might differ and also to see each vendors replica implementation to be different from another. In practise this indeed holds true and we can see the actual bass frequency dip at a much higher frequency within one model compared to another, just as an example.

… the more I boost the EQ the more it makes me smile …

A reviewers statement misguided by simple loudness increase?

Fun fact: Like the original device, all current (hardware) replica models do not have an output gain control. Also they increase the overall signal level just by getting inserted into the signal path.

So, where is the beef? Its definately not in the curves or the overall concept for sure. Maybe I’ll take some time for a follow-up article and a closer look into the buffer amplifier design to see if all the hype is justified.

Further Links

Not really demystifying but fun to read:

In the VoS plugin line you can find some Pultec style low end performance within NastyVCS: https://varietyofsound.wordpress.com/2010/05/07/nastyvcs-released-today/

Also interesting to read and hear: https://www.sweetwater.com/insync/pultec-shootout-with-sound-samples/

how old are your ears?

(via)